
Hello guys, welcome to this new project. In this project you will learn about Convolutional Neural Networks and the project is to Detect You whenever you are in-front of your laptop. One thing I want to conform before starting our project, this project is totally different from face detection. I will discuss about face detection in another session. And guys don't worry about code. 'Why worry, when we have Google's Tensorflow!'.You can find the code here, have a look. OK guys lets start our project.
One thing you have to notice at the last layer. We have 1 output layer(yes or no), this says that whether you are present in-front of laptop or not.
 |
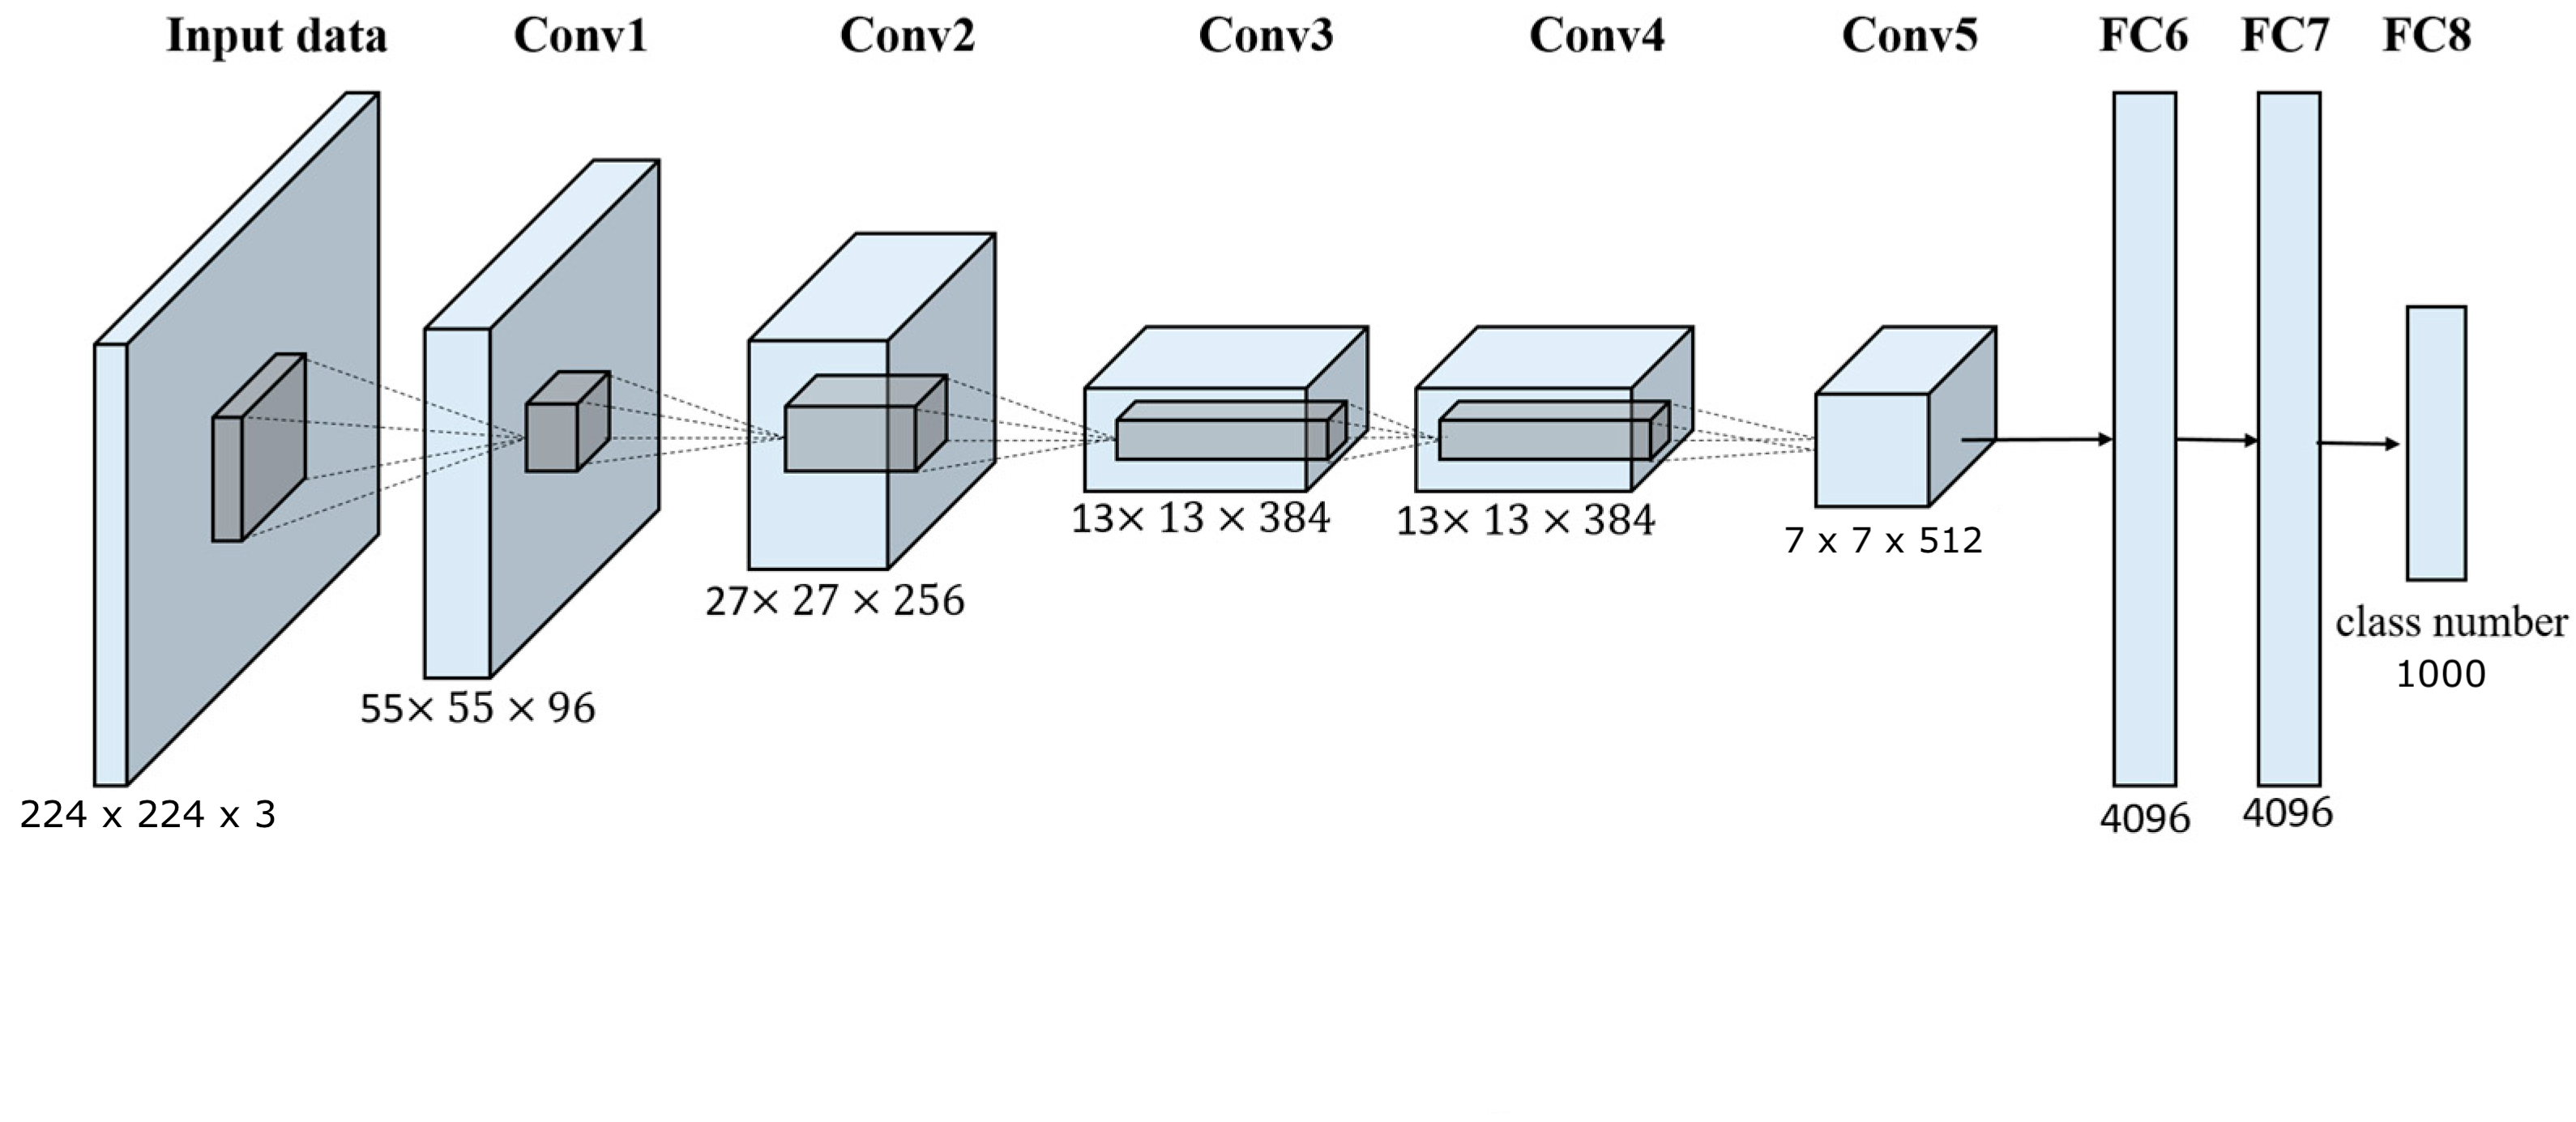
| Convolution Neural Network |
Convolution Neural Network(CNN)
Why CNNs?
Let us start the session from this question - Why CNNs? We have DNN(Deep Neural Networks) which performs well on images but why CNNs? To know the reason, let us assume we have an RGB image of shape (64,64,3). This has 12288 (64*64*3) number of pixels (It is also called as 12288 Dimensional feature vector).It is not too bad! But as technology increased we can find images of (1000,1000,3) that has nearly 3 Million Dimensional feature vector.
These 3M Dimensional feature vector leads to large number of parameters(~=3 Billion parameters).It's difficult to get enough data to prevent neural network from overfitting .And also, the computational requirements and the memory requirements to train a neural network with three billion parameters is just a bit infeasible. So we use Convolutional Neural Networks.
Introduction and working
I will be explaining the working on CNNs in following steps.
 |
| Convolution |
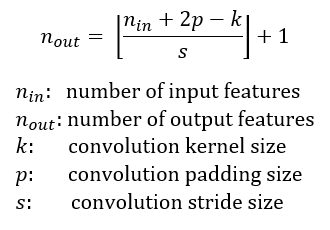
- First you need an input image of any shape(let us consider (5,5,3) for now), it may be a RGB image or a gray scale image and you need a filter of shape (3,3) or (5,5) or so on... You can take of any shape of filter/ kernel, but most probably we consider these shape. But let us consider we are using a (3,3) filter for now.
- Now take that filter keep it on the starting (top left) of the image and do a dot product of image pixels and the filter. Then move one stride and again perform the dot product of image pixels and filter and so on.
- Here the dot product is nothing but, we are doing convolution for image and filter.( (5,5,3) * (3,3) where * denotes convolution).Note that here we are using only one filter.
- That's all. Now our input image of shape (5,5,3) becomes (3,3,3) image. You can notice that image is shrinking here. We can also say is as, the CNN is extracting the features from the images.
- Here the edges of the image is involving less number of time in the convolution. This means that we are losing information at the edges of images. We don't want that! So we add padding layers.
- To calculate the output shape of the image you can use the formula below
 |
| padding |
 |
Pooling
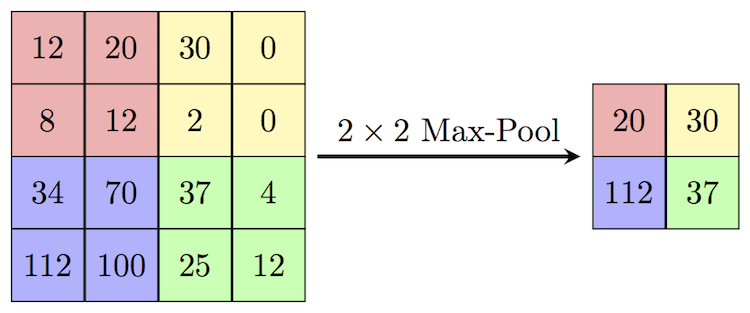 |
| Pooling |
Now let's talk about pooling layer. Their
goal is to subsample (i.e., shrink) the input image in order to reduce the computational load, the memory
usage, and the number of parameters (thereby limiting the risk of overfitting). Reducing the input image
size also makes the neural network tolerate a little bit of image shift.
Just like in convolutional layers, each neuron in a pooling layer is connected to the outputs of a limited
number of neurons in the previous layer, located within a small rectangular receptive field. You must
define its size, the stride, and the padding type, just like before. However, a pooling neuron has no
weights; all it does is aggregate the inputs using an aggregation function such as the max or mean.
Above figure shows a max pooling layer, which is the most common type of pooling layer. In this example,
we use a 2 × 2 pooling kernel, a stride of 2, and no padding. Note that only the max input value in each
kernel makes it to the next layer. The other inputs are dropped.
Flatten
It just makes the output features into a N-Dimensional vector. For example you have an shirked image at some specific layer of shape (32,32,128), then this flatten makes this as a (32*32*128) dimensional feature vector.
Dense
This dense layer is also known as fully connected layers.
Now let's start coding!!!
Import necessary modules
import tensorflow as tf
from tensorflow import keras
from keras import models
from keras import layers
from keras import optimizers
from keras.preprocessing.image import ImageDataGenerator
Prepare the data
Follow the steps below to make training data. Take some images(4000 images) with you present infront of webcam(2000 images) and without you(2000 images) in-front of webcam by runnig the capturing_images.py file and store the both files in Train dir.
Similarly, take some images(1600 images) with you(800 images) and without you(800 images) infront of webcam by runnig the capturing_images.py file and store the both files in Validation dir.
Now make sure that both Train and Validation files are in one Directory.
Build the CNN model
size = 128
model = models.Sequential()
model.add(layers.Conv2D(32, (3, 3), activation='relu', input_shape=(size,size,3)))
model.add(layers.MaxPooling2D((2, 2)))
model.add(layers.Conv2D(64, (3, 3), activation='relu'))
model.add(layers.MaxPooling2D(2, 2))
model.add(layers.Conv2D(128, (3, 3), activation='relu'))
model.add(layers.MaxPooling2D(2, 2))
model.add(layers.Conv2D(128, (3, 3), activation='relu'))
model.add(layers.MaxPooling2D(2, 2))
model.add(layers.Flatten())
model.add(layers.Dropout(0.5))
model.add(layers.Dense(512, activation='relu'))
model.add(layers.Dense(1, activation='sigmoid'))
 |
Compile the Model
Here we have used RMSprop optimizer and binary crossentropy as loss function because it is a classification problem.
model.compile(optimizer=optimizers.RMSprop(lr=0.0003),
loss='binary_crossentropy',
metrics=['acc'])
Train the model
train_datagen = ImageDataGenerator(
rescale=1./255,
rotation_range=40,
width_shift_range=0.2,
height_shift_range=0.2,
shear_range=0.2,
zoom_range=0.2,
horizontal_flip=True)
validation_datagen = ImageDataGenerator(rescale=1.255)
In the above code we have done data augmentation for the training data. Make sure that we are not doing data augmentation to validation data.
But what is actually Data Augmentation??
Data augmentation improves our training data by rotating images for certain angle, zoom in the images, horizontal flip, etc.
| Data Augmentation |
train_generator = train_datagen.flow_from_directory(directory + '\Train',
target_size=(size,size),
batch_size=64,
class_mode='binary')
validation_generator = validation_datagen.flow_from_directory(directory + '\Validation' ,
target_size=(size,size),
batch_size=64,
class_mode='binary')
Then we have set our training and validation data. One of the advantages of keras and tensorflow is that it directly takes the images from the directory. Similarly we have to set the target size of the images and batch size. And finally here class_mode should be binary because it is a classification problem(yes or no, present or absent in-front of laptop).
Finally fit your model!
model.fit_generator(train_generator,
epochs=5,
steps_per_epoch=63,
validation_data=validation_generator,
validation_steps=7, workers=4)
Save the model
You can save the model by using the following piece of code
model.save(directory + '\model.h5')
Yoo! you came to end of the project. To see how the output looks like please refer my github here
OK guys, I hope you got some information from this post. Please share it to your friends and also you can find my other projects here
Thank you!
Contacts:
ph.No: +91 9182530027
gmail: hunnurjirao2000@gmail.com
github: github.com/hunnurjirao
Good work dear..keep learning nd help others to learn.. all the best.
ReplyDeleteThank you!
Delete